
Tenant Income Verification: How to Check Applicants Fairly
Learn how tenant income verification works, which documents prove income, how to check bank statements, and how to screen every applicant fairly.

A rental application lands in the inbox with a salary figure typed into a box, three pay stubs attached as phone photos, and a bank statement PDF that may or may not belong to the account the applicant uses. Somebody on the team has to decide, by Friday, whether the number is real.
That decision carries money and legal weight. Get it wrong one way and the property absorbs a tenancy that can't pay. Get it wrong the other way and a qualified applicant is turned away over a document we mishandled or a feeling we can't defend in writing. Treating tenant income verification as a consistency control, rather than a hunch or a fraud hunt, fixes both problems at once.
Table of Contents
- Why Income Claims Need Proof Before a Lease
- The Evidence Ladder for Verifying Income
- Reading Bank Statements for Recurring Income
- How to Convert Statements and Run the Balance Check
- Verifying Self-Employed, Gig and Rental Income
- Applying Fair and Consistent Screening Rules
- Confirm the Income Decision Before You Sign
Why Income Claims Need Proof Before a Lease
An applicant lists $6,000 a month in salary on a rental application. The form doesn't say whether that's gross or net, whether it's the same job as last year, or whether the money lands in an account every second Friday. Somebody has to find out before a lease goes out.
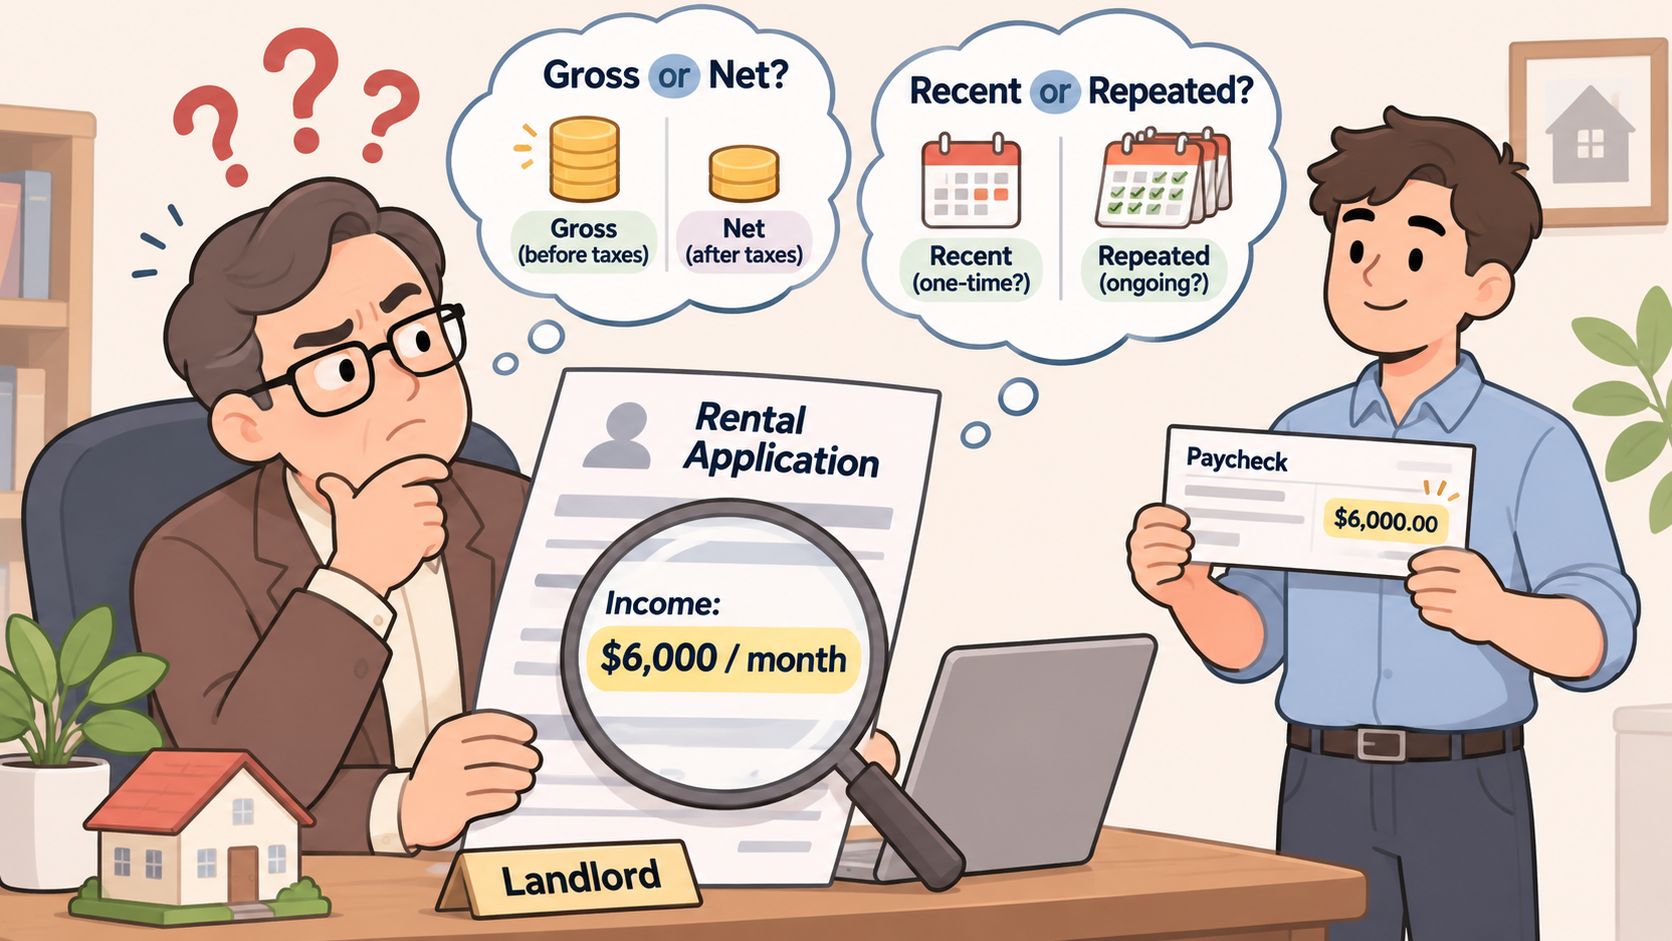
Tenant income verification is the work of confirming four things about a claim: the amount, the source, the period it covers, and whether the money arrives on a regular rhythm. Every document in a verification file, whether a pay stub, a statement or an employer call, exists to answer one of those four questions.
Think of an income claim as a paper check presented at a bank window. The number written on it means nothing until the bank confirms the money exists and will arrive on schedule. An application with $6,000 in a box is that piece of paper. The statements behind it are the clearing process.
Most disputes start with a simple gap. Applicants quote gross pay, while accounts receive net pay after tax, pension contributions, health premiums and garnishments. A deposit figure that looks modest next to the application is often just an applicant quoting their offer letter. That isn't fraud, it's imprecision, and it becomes obvious once you know what to compare.
Verification isn't a boutique step either. In a 2025 survey of nearly 700 landlords, RentRedi reported that 90% verify applicants' income before making leasing decisions. The open question isn't whether to check. It's how to check the same way every time.
What follows is a ranked set of evidence types, a method for reading statements for patterns rather than single lines, a way to handle income that never arrives as payroll, and a screening standard you can defend to an applicant who asks why they were turned down.
The Evidence Ladder for Verifying Income
The strongest evidence comes from a source the applicant doesn't control. The weakest is the applicant's own written word. Everyone screening tenants works somewhere between those two, and the useful discipline is to climb as far up the ladder as the available evidence allows, then record the rung where you stopped.
| Method | Strength | Typical source | Main limit |
|---|---|---|---|
| System or database match | Highest | Employment and wage records in federally assisted housing systems | Access limited to specific programs |
| Written verification from employer or benefit provider | High | Signed employer letter or benefit award letter | Slow, and depends on the employer responding |
| Oral source verification | Medium-high | Documented phone call to the employer, with name, date and content noted | Hard to audit without written notes |
| Bank deposit history | Medium-high | Statements showing payer, amount and date | Shows deposits, not whether they are income; transfers must be excluded |
| Pay stubs and tax returns | Medium | Recent pay stubs, Form 1040 and schedules | Easy to alter; confirm against other evidence |
| Tenant self-certification | Lowest | Applicant's written statement | Use only when a documented fallback applies |
Why the order holds up
HUD's income verification guide for assisted housing ranks upfront income verification first, including mandatory use of its Enterprise Income Verification system for applicable reexaminations. Written verification straight from the income source comes second, oral source verification third, and tenant or family certification last. The sequence isn't bureaucratic habit. Records maintained by a payroll system or a benefits agency never pass through the applicant's hands, so they can't be softened, rounded or selectively excerpted.
The effect shows up in HUD's own programme numbers. HUD estimated that tenant underreporting produced $978 million in combined income and rent errors in fiscal year 2000, and its Enterprise Income Verification programme page puts the figure at $364 million by fiscal year 2008, a reduction of roughly 63%. The improvement came from better verification, not from a sudden change in applicant behaviour.
What that means for a two-unit landlord: you'll never reach a wage database, but the principle scales down cleanly. A signed employer letter beats a screenshot of a pay stub, and twelve months of named deposits beat both.
Where a private landlord can realistically climb
Private landlords and property teams can't query government income systems, so the top rung stays out of reach unless they happen to screen for a programme that supplies it. The highest rung available is written verification from an employer or benefit provider, followed by a documented phone call, then statement evidence showing named external payers.
The fallback matters as much as the climb. HUD expects the administrator to document why third-party verification couldn't be obtained before relying on tenant certification alone. Adopt that habit. A line in the file saying the employer's HR line didn't answer on two attempts, and the applicant's only alternative is a signed declaration, is worth far more than a silent approval.
Uploaded pay statements, statements and award letters corroborate. They don't conclude. When a document contradicts the claim, the file goes to source-level verification, not straight to acceptance or rejection.
Reading Bank Statements for Recurring Income
A single deposit proves almost nothing. A pattern of deposits proves a great deal, and the pattern is what we read when statements carry the weight of a verification file.
The CFPB regulation on verifying a consumer's income treats transaction-account statements as verification evidence when they show another person's income being deposited into the applicant's account, including regular deposits into a joint account. The same rule says a reliable record identifies both the amount and the date of the income paid. That gives us three fields to work with on every credit line: who paid, how much, and when.
| Signal | Genuine income pattern | Warning sign |
|---|---|---|
| Payer name | Same employer or platform in every period | No payer name, or one-off sources |
| Cadence | Biweekly or monthly on a steady schedule | One large deposit with no rhythm |
| Amount | Consistent across at least three months | Amounts swing widely or change without explanation |
| Net versus gross | Deposits land at roughly 70% to 80% of the stated gross | Deposits far above or far below the claimed figure |
| Balance behavior | A cushion remains after rent-sized debits | Every deposit drains to near zero within days |
| Source of funds | External payer names | Transfers from the applicant's own accounts |
Net pay versus the number on the application
Take that $6,000 gross salary and expect to see roughly $4,200 to $4,800 hitting the account each month once tax and deductions come out. A deposit series at that level is a match, not a shortfall, and treating it as one wastes everyone's time.
The mismatch worth investigating runs the other way: deposits at or above the quoted gross for someone on payroll, or a deposit series that jumps around with no explanation while the application quotes a flat salary. Pull three months of statement detail side by side and both versions become visible at a glance.
Two checks that catch what the deposits miss
The round-number warning is the one we see most often. A few weeks before applying, a $3,000 or $5,000 transfer lands with no payer name and no history of anything similar, and the account suddenly looks healthy. It's usually borrowed money or a shuffle from another account the applicant owns. The tell is that it vanishes as quickly as it arrived.
The cushion test reads the running balance rather than the credits. An account holding a buffer after rent-sized debits tells a different story from one where every deposit drains to near zero within days, even when the headline income is identical.
Real income is boring. Same source, same rhythm, month after month.
A spreadsheet makes this cheap. Filter the credit column, group by payer, total each month, and the income pattern is visible. On paper statements with a highlighter, the same job eats an evening.
How to Convert Statements and Run the Balance Check
A converted statement is only as trustworthy as the arithmetic inside it. Six steps take a bookkeeper from a PDF to an income figure worth relying on.
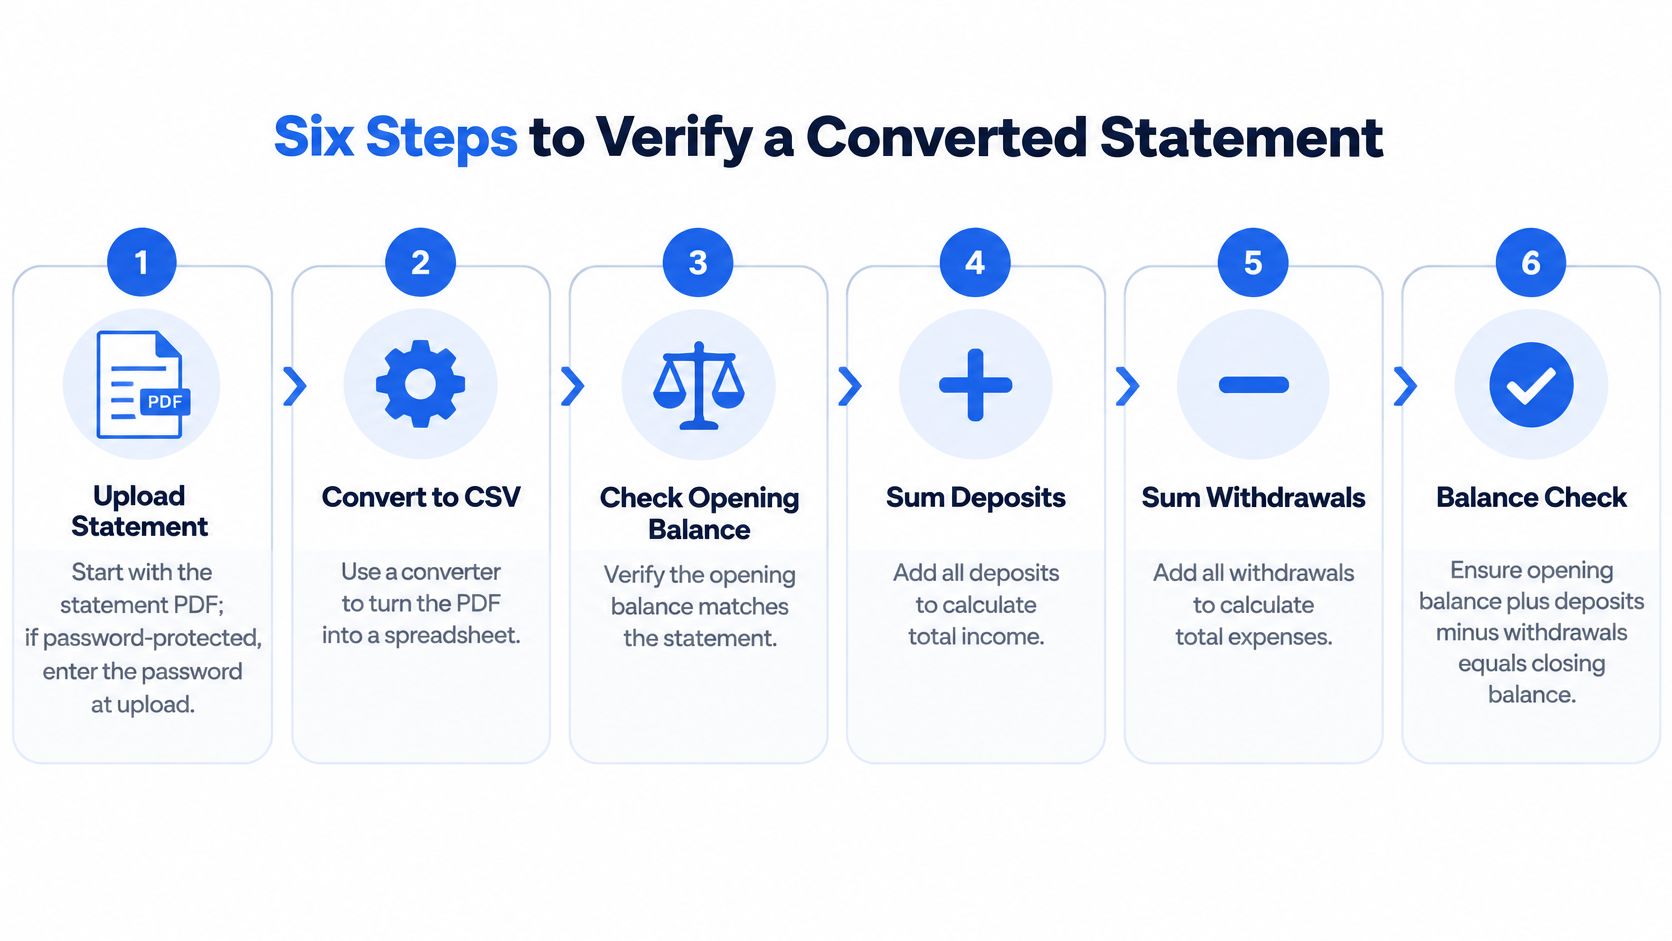
- Start with the original PDF. If the file is locked, take the password from the applicant and enter it at upload rather than stripping protection in a separate tool. For a scanned statement, compare OCR output against the page image line by line before trusting anything downstream.
- Convert to CSV or XLSX. Keep date, description, debit, credit and running balance as separate columns. A single merged amount column still works, but it slows the payer grouping in step four.
- Run the balance check. Opening balance plus credits minus debits must equal the printed closing balance, allowing for any clearly identified bank fee or adjustment.
Why step three carries the weight
The CFPB's small business review panel materials on income verification warn that forged bank statements and pay stubs are readily available online. An edited deposit breaks the arithmetic even when the PDF renders perfectly, because the balances above and below the change stop walking to the printed closing figure. That's the control a visual scan can't replicate.
Keep the check manual and run it on every statement. Nothing about a conversion verifies a document for you; the conversion only makes the arithmetic fast enough to do properly. In our converter, a locked file is opened by entering the password at upload, and the password is used only for that conversion.
- Group credits by payer and total each month. This produces the monthly series you'll compare against the claim.
- Flag the exceptions. Duplicate deposits, internal transfers, refunds, cash deposits and unexplained month-to-month changes get a reviewer's eyes rather than a silent pass. HUD's guidance on recurring verification identifies discrepancies of $2,400 or more for investigation in the applicable EIV process, which is a reasonable threshold for escalating a file.
- Compare to the application. A recurring total far below the stated gross means a conversation. A total at or above it means a different conversation.
A failed check triggers review, not rejection. Ask for pay stubs, benefit statements, tax records or employer confirmation, and note in the file which alternative was accepted and why. Teams converting statements monthly can turn statement PDFs into spreadsheet rows with the columns intact, then run the balance check on the output.
Verifying Self-Employed, Gig and Rental Income
Verify irregular income by the month. One large deposit proves little about a gig worker's earnings, and one slow week proves little either. The monthly series carries the evidence, and the document list stays identical for every applicant in the same income category so the review is consistent across files.
| Income type | Documents to request | Calculation method | Exclusion check |
|---|---|---|---|
| Gig or platform earnings | Platform payout reports and three to six months of statements | Monthly totals, with the average and the worst month | Exclude transfers from the applicant's own accounts |
| Freelance or client income | Invoices and client payment records for three to six months | Monthly totals grouped by client | Confirm every payer is external |
| Salaried with variable pay | Recent pay stubs and a year-to-date statement | Average variable pay over a stated period | Separate base pay from overtime or tips |
| Rental income | Current lease or rental agreement, plus Schedule E where applicable | Match deposits to lease terms | Written explanation for any gap in the rental history |
| Benefits or child support | Award letter or agency record | Stated monthly amount | Confirm deposits match the award |
The average and the floor
Gig work arrives as dozens of small credits: platform payouts, client transfers, marketplace settlements. Convert three to six months, group by source, total each month, and two numbers emerge. The monthly average shows what a good stretch looks like. The floor, the worst month in the series, shows what happens when work dries up.
Say the monthly totals run $3,400, $5,100 and $2,200. The average is about $3,570. Against a $2,500 rent, that average looks comfortable and the floor doesn't, so the file needs a real conversation about the low month rather than an automatic approval off the mean.
The standard we apply: the worst month in the series should still cover rent comfortably. Averages hide exactly the dry spells that turn into missed payments.
The exclusion rule matters here more than anywhere else. Transfers between the applicant's own accounts inflate apparent income and should never enter a total. Genuine revenue carries an external payer name. When a reviewer removes an internal transfer from a total, that edit belongs in the decision file, because the next reviewer should be able to see why two near-identical statements produced different income figures.
Rental income and gaps in the record
When the income is rent rather than wages, ask for a current lease or rental agreement and match deposits to its terms in the statements. IRS Form 1040 Schedule E supports the claim where the applicant files one. Any unexplained gap in the rental history gets a written explanation from the applicant rather than a silent pass or an automatic strike. The applicant states the reason, the reviewer records it, and the file shows the gap was examined. That rule applies whether the gap lasted one month or a year, and whether the applicant is a first-time landlord or a seasoned one.
Fraud pressure is real while you do this. Snappt's January to June 2025 fraud review covered more than 767,519 rental applications and 2.8 million documents, identifying 49,821 edited or tampered submissions. Stronger authentication still doesn't excuse reading a thin file as a denial. For applicants paid in cash or without a bank account, request award letters, invoices, platform reports or employer confirmation, and record why a bank record wasn't available. Our guide to self-employed bookkeeping records covers the document set that holds up.
Applying Fair and Consistent Screening Rules
Fair screening comes down to a plain commitment: the same evidence, the same rules and a clear route to correction for every applicant. Most published advice on tenant income verification stops at fraud control. It tells you to check pay stubs, statements, employer records and screening reports, then says very little about what you may collect, how long you keep it, or whether an applicant can see the source data and fix an error.
That silence has costs. The Urban Institute's March 2025 review of tenant screening reports that screening datasets increasingly combine income, credit, eviction and criminal-history information, and that proprietary collection and matching practices can cause applicants to be incorrectly denied housing. From the applicant's side, a bad match in a database they never see is indistinguishable from a judgement about their character.
The controls that make a decision defensible
Write the income criteria down before a single file is opened. Fix the rent-to-income threshold, the document list and the treatment of irregular income, then apply them identically to the first applicant and the twentieth.
Collect only income-relevant fields. If a statement shows a medical payment or a settlement, that line stays out of the review file even though it arrived in the same PDF. Data minimisation isn't a legal nicety; it's the difference between a file you can defend and one you'd rather not discuss.
Get consent and explain what's checked. Applicants who know the process and the timeline dispute fewer outcomes, and the consent record answers the question of authority later.
Store documents securely with a retention limit. Decide in advance how long statements and stubs stay on file, restrict access to the people making the decision, and delete at the end of that window.
Send an adverse-action notice where the law requires one. It should name the decision, the evidence relied on and the route to dispute it, not just a status change in a portal.
Give the applicant a correction route. A wrong employer name from a payroll feed is a five-minute fix for the applicant and a wrongful denial if nobody asks.
The decision file is the defence: source, retrieval date, income type, period covered, how income was normalised, who reviewed it and what happened to each discrepancy.
Then test the standard. Two applicants with the same evidence should get the same answer, and an unexplained mismatch earns a request for more evidence rather than a quiet rejection.
Confirm the Income Decision Before You Sign
Every file ends in one of three outcomes, and a short checklist gets you there without guesswork.
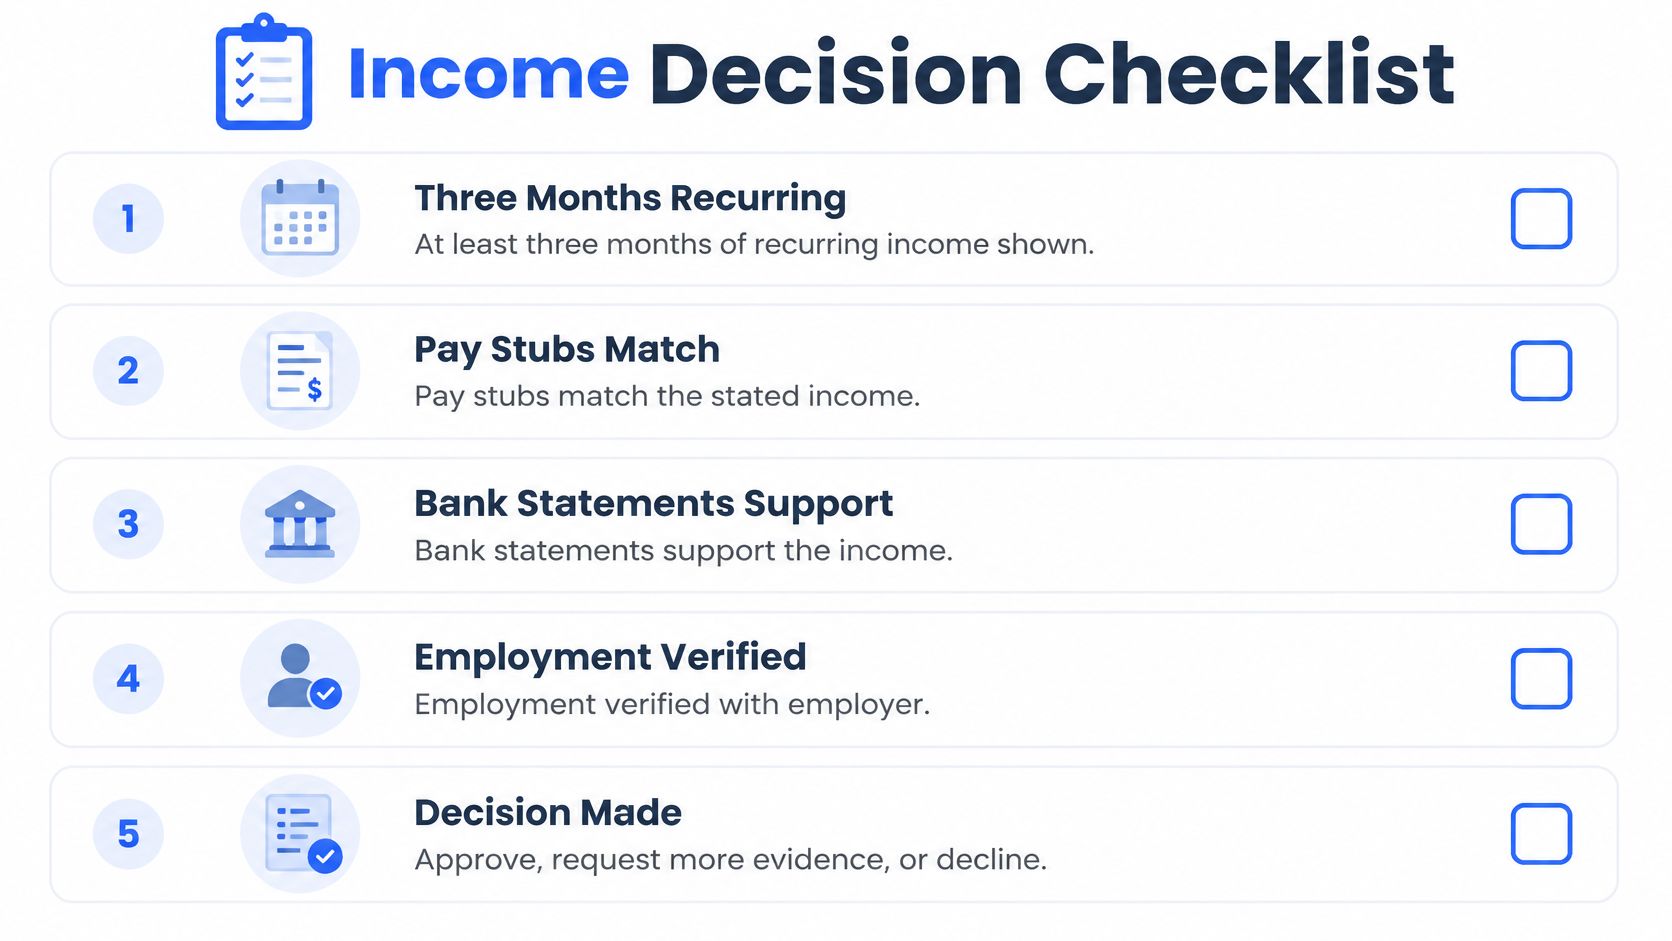
| Check | Pass condition | If it fails |
|---|---|---|
| Recurring deposits | At least three months from external payers | Request more evidence |
| Net pay match | Deposits fall within the normal net-to-gross range for the stated pay | Request pay stubs or an employer letter |
| Worst month | Still covers rent comfortably | Discuss with the applicant and request more evidence |
| Balance check | Opening balance plus credits minus debits equals the closing balance, with the result recorded | Review and request alternative evidence |
| One-off deposits | Round-number or one-off deposits identified and explained | Exclude from income and ask for an explanation |
| Self-transfers | Excluded from income totals | Remove and recalculate |
| Reviewer sign-off | Decision file saved with source, date and reviewer | Do not decide until the file is saved |
Approve when the pattern and the arithmetic both hold: named payers, a steady cadence, a floor that clears the rent, and a statement whose balances walk from opening to closing.
Request more evidence when the pattern is thin or a check fails. This is the most common outcome in a well-run process, and it isn't a soft rejection. It's the same standard applied to a file that arrived incomplete.
Decline only after evidence has been requested, a correction route offered and the applicant has had a chance to respond. A decline built on a mismatch nobody asked about is the one that gets challenged.
The rules behind each line sit in the evidence ladder, the statement-reading method and the irregular-income calculation earlier; the checklist only enforces them.
For teams converting statements every month, autobankstatement produces a clean CSV or XLSX from digital, scanned or password-protected PDFs, with a browser preview and quick edits before download. You can download a clean spreadsheet for bookkeeping, taxes, reconciliation or reporting, and keep the original PDF beside it while you run the balance check yourself on every statement.
Tenant income verification is a data problem before it's a judgement problem, and autobankstatement handles the tedious half: upload digital, scanned or password-protected statement PDFs, review the converted table in your browser, and download a clean CSV or Excel file you can filter by payer and total by month. Start with a free guest preview to see how your own statements come through before you commit to a plan. Keep the balance check in your own hands, and let the conversion give you the rows to run it on.
Convert your next statement in minutes
Upload a bank statement PDF — digital, scanned, or password-protected — preview the extracted table, and download clean CSV or Excel.